
A pot without a drainage hole can leave roots sitting in water even when the surface looks dry. Before buying plants, make sure excess water can leave each container—and that it has somewhere safe to go. On a balcony, runoff can stain paving or drip into a neighbor’s space; indoors, it can damage the floor. A saucer will catch it, but empty the saucer after watering unless the container is designed to hold water below the pot.
Checklist 1: Assess the space before choosing plants
Watch the intended spot over a normal day. Note when it gets direct sun, when buildings or railings cast shade, and how much wind reaches it. Plant labels commonly use terms such as full sun, part sun, and shade. Many fruiting vegetables need roughly six or more hours of direct sun, while leafy greens and some ornamentals can manage with less. A wall or paved surface can reflect heat onto a pot, making a sunny corner tougher on plants than a garden bed with the same hours of light.
- Check access: Leave room to water, prune, and lift each pot when needed. Keep doors, drains, and escape routes clear.
- Check exposure: Wind on a high balcony can dry pots quickly and tip tall plants. Where wind is strong, choose stable, low-profile containers.
- Check water: Think about how far you will carry a filled watering can and where runoff will collect.
- Check permission: Review lease, building, or homeowners’ rules before attaching planters to railings or changing a shared space.
On raised decks, balconies, and roof terraces, weight also matters. Wet potting mix, containers, plants, and stored water all add to the load. Do not group large, heavy planters in one area without knowing the structure’s capacity. For a substantial installation, or if you are unsure about loading, ask the building owner or a qualified structural professional. A gardening guide cannot establish a safe load for a particular balcony.
Checklist 2: Start with a manageable planting plan
Start with two or three crops or plant types instead of filling every corner. Choose for the light you have and the current season. Lettuce, chard, and some herbs can work in modest spaces. Tomatoes and peppers generally need more sun, larger pots, and closer attention to watering. A compact cultivar may be easier to manage, but a “dwarf” label does not remove the need for adequate soil volume and support.
Know what you want from each pot: a harvest, flowers, or foliage. If you are growing food, pick plants you actually use, then check their mature size, days to harvest, and recommended spacing. A full-looking pot at planting time may become crowded as plants grow, drying unevenly and restricting airflow.
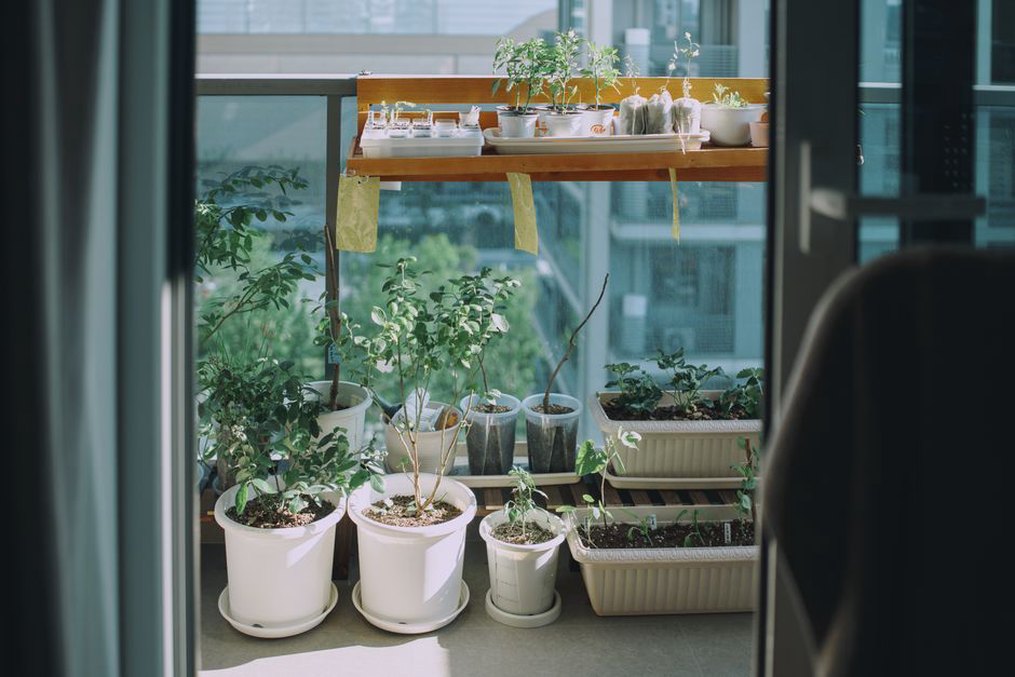
Checklist 3: Select containers for roots, drainage, and stability
A container needs enough room for roots and enough mix to moderate changes in moisture. A shallow trough can suit many salad greens; a fruiting tomato usually needs a much larger pot. Use the plant label as a starting point, then consider local heat and how long the pot may go between waterings. Tiny pots dry quickly in summer. An oversized pot holding a small seedling, meanwhile, can stay wet too long if watered without checking the mix.
Look for drainage holes near the bottom. If a decorative planter has none, use it as an outer cover for a removable nursery pot and empty any water trapped inside. Stones at the bottom of a hole-free pot are no substitute for drainage. If a hole is large enough to let mix escape, cover it with mesh without sealing it.
Material changes how often you may need to water. Porous terracotta loses moisture through its sides and may help where mix tends to stay wet, though it often needs more frequent watering. Plastic and glazed pots hold moisture longer. Whatever the material, check that the planted pot will be stable and its tray can catch routine runoff. For a suspended planter, use approved hardware and mounting methods; a wet hanging basket weighs much more than an empty one.
Checklist 4: Fill pots with suitable growing mix
Use potting mix made for containers, not soil dug from the garden. Garden soil can compact in a pot, reducing air around the roots and slowing drainage. Container mixes are made to retain some moisture while leaving pore space for air. Check whether the bag says fertilizer is included, as that will affect when you need to start feeding.
Leave about 2–3 cm between the mix and the pot’s rim so water can soak in instead of spilling straight over. Moisten very dry mix before planting; it may initially repel water. Avoid pressing it down hard. Once you have watered thoroughly, add more mix if settling exposes roots or leaves a seedling too low in the pot.
Checklist 5: Plant at the right depth and spacing
For seedlings, follow the label’s spacing advice. Keep the top of the root ball roughly level with the surrounding mix unless the plant’s instructions say otherwise, and gently loosen any roots circling tightly inside the nursery pot. Water to settle the mix around the roots, then make sure the plant is upright. If it will need a stake or cage, add one while the roots are small; installing it later can disturb them.
For seeds, use the packet’s sowing depth and germination temperature. Tiny seeds are often covered only lightly, while larger ones may go deeper. Sow a few extra where the packet recommends it, then thin the seedlings to their final spacing. Removing extras can feel wasteful, but leaving them crowded usually limits the plants you keep.
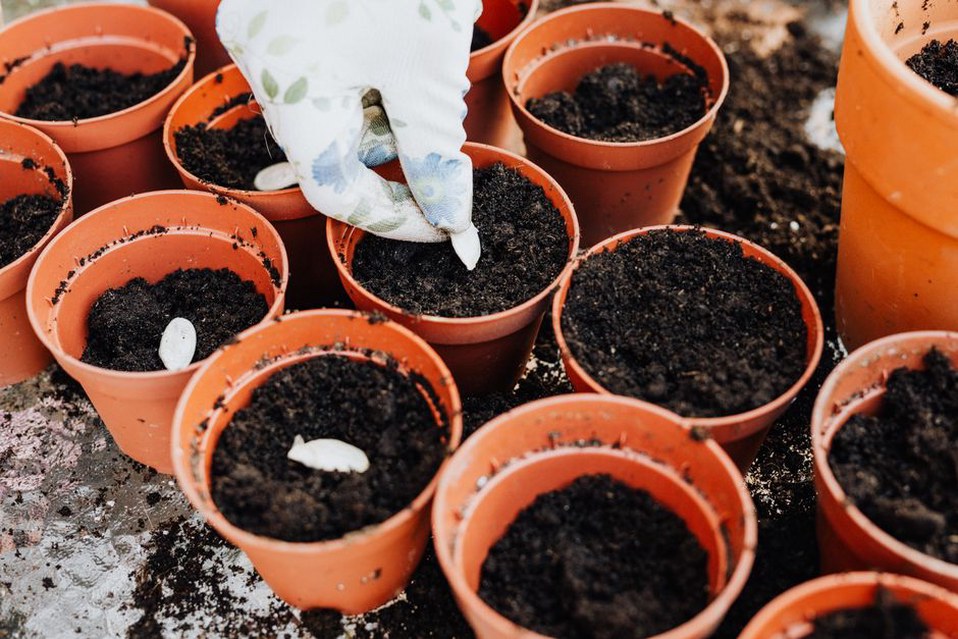
Checklist 6: Establish a watering routine based on the mix
No daily watering rule works for every pot. Drying rates change with container size, plant maturity, wind, temperature, and rainfall. Push a finger a few centimeters into the mix. If it feels dry there, water slowly until moisture starts to leave the drainage holes. If it still feels damp, check again later. In a large pot, test more than one spot, especially if sun reaches the surface unevenly.
Water the mix rather than relying on a spray over the leaves. If water runs off a dry surface, pour in stages to give it time to soak in. Empty saucers once excess water has drained, particularly indoors. Check small or sun-exposed pots more often during hot spells. After rain, feel below the surface before assuming each pot got enough: one tucked against a wall or under an overhang may still be dry.
Checklist 7: Feed, monitor, and adjust
Plants use nutrients in their limited volume of mix, and watering can wash some away. If the mix contains starter fertilizer, check how long it is meant to last before adding more. Otherwise, follow the fertilizer label for container plants and the crop you are growing. Extra fertilizer cannot make up for too little light or root space; too much can harm roots or promote leaves at the expense of flowers and fruit.
Take a close look at plants when you water. Yellow leaves, wilting stems, holes in foliage, or mix that remains wet for days call for a closer look, but none points to a single cause on its own. A wilted plant may have dry mix or waterlogged roots, so feel the mix before reaching for the watering can. Check leaf undersides for pests, remove badly damaged leaves when appropriate, and leave space between pots for air movement.
A practical first-week check
- Day one: Water newly planted pots thoroughly and confirm that each drains freely.
- Days two and three: Check below the surface at roughly the same time each day. Note which pots dry fastest.
- By the end of the week: Move any pot whose plant is getting clearly less light than expected, and adjust watering to what its mix needs.
Keep a short note of each plant’s name, planting date, and what you observe. A small lettuce pot might be dry every afternoon while a larger pot beside it stays damp. Even on the same balcony, they need different watering schedules.