
A sculptural reception desk may make a hospital entrance feel welcoming. But if a wheelchair user cannot approach it comfortably, or a receptionist cannot see someone waiting for help, the design has missed its purpose. Desk height, sightlines, acoustic privacy, cleanable surfaces and position along the arrival route all affect how well it works.
Hospital interiors have to accommodate vulnerable patients, around-the-clock staffing, moving equipment, frequent cleaning and rooms whose clinical use may change. Appearance still matters: it can affect orientation, dignity and how people perceive their care. It needs to be developed alongside those demands, not applied once the plan is fixed.
Define what each space needs to do
No single aesthetic suits every hospital room. A public lobby can accommodate more expressive materials than a procedure room. A family waiting area may benefit from softer lighting and varied seating; a medication preparation area needs clear task visibility and surfaces suited to its cleaning protocol. Applying the same visual treatment to both can create costly compromises.
At concept stage, prepare a short brief for each space: who uses it, what happens there, what equipment it holds, how it is cleaned, and what separation, privacy and atmosphere it needs. Include work that is easy to overlook, such as waste collection, bed movement and maintenance access. Then test each proposed feature against the brief. Does it help people use the room, or create an exception staff will have to manage?
Bring clinical users, facilities staff, infection prevention specialists, accessibility advisers and building operators into those early conversations. Their requirements will sometimes conflict. A transparent partition, for example, might improve daylight and oversight while exposing a patient to views from a corridor. Moving the partition or using controlled glazing may address both concerns.
Make arrival calm without obscuring the route
Visitors may arrive anxious, late or unfamiliar with the building. At the entrance, a legible plan usually does more than elaborate decoration. People should be able to identify reception, the main stairs or lifts, and the route to their department. Signs cannot fully repair a layout with several equally prominent corridors.
Architectural cues can help. A consistent floor treatment might mark the public route, while a change in ceiling height or lighting signals a major decision point. Test those cues under the lighting conditions in which the hospital operates, and do not rely on color alone. Contrast, readable type and accessible sign placement matter for people with visual or cognitive impairments.
At reception, check sightlines from seated and standing eye levels. Make sure the queue does not block circulation, conversations cannot be overheard across the waiting area, and staff can spot someone who needs assistance. An open entrance can still protect privacy when registration desks, screens and seats are positioned carefully.

Give waiting areas choices, not just seats
People use a waiting room differently. A patient may need armrests to stand up; a family may need seats together; someone receiving sensitive news may want distance from the main flow. A mix of seating positions serves these needs better than identical rows. Keep routes clear for wheelchairs, walkers and staff moving equipment, and check turning and approach space against applicable accessibility requirements.
Daylight and views can make a long wait more tolerable, but direct sun can cause glare or overheating. Assess shading, glazing and seat orientation together. Position appointment-information screens so people do not have to reveal personal details to the whole room.
Use materials that retain their character under cleaning
A warm-looking finish need not be fragile. What matters is whether the material, its joints and its protective details can withstand the cleaning and wear expected in that location. A sample-board finish may look convincing but fail where beds strike a wall or disinfectant repeatedly reaches a seam.
Specify by zone and exposure: public seating areas, clinical rooms and service corridors do not face the same demands. Confirm compatibility with the facility’s cleaning products and procedures, including contact times where relevant. Review how corners, edges, transitions and penetrations will be sealed and repaired. Infection prevention requirements and local codes may restrict an assembly in one space even if a visually similar option is suitable elsewhere.
- Walls: Consider impact protection along bed routes and details that avoid hard-to-clean ledges.
- Floors: Assess slip resistance, rolling loads, cleanability and the effect of joints or thresholds on equipment movement.
- Furniture: Check upholstery, seams and replacement parts against cleaning practice and the needs of patients with limited mobility.
- Ceilings: Coordinate lighting and access panels so maintenance does not damage the finished surface.
Review samples under the intended lighting and beside adjacent finishes. A patterned floor can add warmth, but a strong change in pattern may appear to be a level change to some users. Visual interest should help people recognize a place without making movement less certain.
Design light and acoustics around the task
Bright, uniform illumination is rarely right for every hospital space. Staff need adequate light for clinical tasks; patients may need lower light to rest. Layered systems can provide general, task and low-level night lighting with separate controls. In patient rooms, position controls so staff can work without unnecessarily lighting a patient’s face or disturbing a neighboring bed.
Check for glare at desks, beds and along corridors, accounting for views toward windows from different heights. Balance daylight with shading and privacy rather than maximizing it without qualification. The lighting scheme must also accommodate emergency operation and any clinical requirements for the room.
Acoustics affect care as well as comfort. Speech passing through a wall can compromise privacy, while doors, carts and building services can interrupt rest. Sound-absorbing finishes may help where cleaning and fire requirements allow them. Room layout, door specification and separation between noisy support work and quiet patient areas often matter just as much. Consult acoustic and clinical teams before placing a visually open partition near confidential conversations.
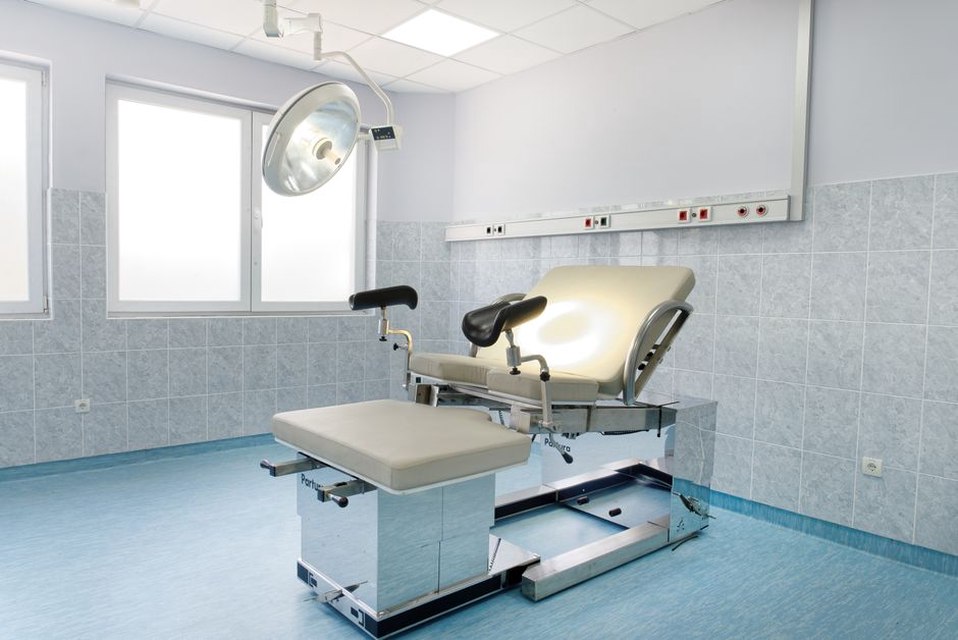
Give staff an efficient workplace without making care feel industrial
Staff need appropriate task lighting, supplies within reach and clear visibility where observation is required. They also need rooms for confidential handovers and breaks away from public circulation. Daylight in those rooms, where feasible, supports sustained use; it is more than a cosmetic benefit.
In patient rooms, clinical equipment need not dominate every view. Coordinate service outlets, storage and equipment parking so frequently used items stay accessible without crowding the bed. Concealment must never delay a response or obstruct inspection. A full-scale mock-up can reveal clashes between doors, furniture and equipment in an occupied room that drawings may understate.
Test visual ideas against operations and cost
Distinctive details bring maintenance obligations. A custom entrance light may require specialized access to replace; an intricate wall finish may need frequent patching where trolleys turn. During design reviews, ask what each feature will cost to install and how staff will clean, inspect, repair and eventually replace it.
A limited set of repeatable details can give departments a coherent identity while simplifying spare parts. Reserve bespoke elements for places where they aid recognition or improve the experience, such as the principal entrance or a key orientation point. That does not mean making every space identical: a pediatric waiting area, an adult inpatient floor and a staff-only corridor can share a design system while meeting different needs.
Full-scale room mock-ups are especially useful for testing reach, visibility and movement. Invite staff from different shifts to work through realistic tasks, including assisting a patient and moving a bed. Record conflicts as specific design changes, rather than general preferences about appearance.
Check compliance without treating it as the design concept
Health-facility standards, building codes, fire rules and accessibility requirements set essential constraints. They vary by jurisdiction and clinical service, so confirm what applies before fixing room dimensions or finish specifications. Compliance alone will not tell you whether a waiting area feels exposed or an entrance is easy to understand.
Keep a decision record for features that touch several requirements. A glazed wall, for instance, may need review for daylight, observation, patient privacy, acoustic separation, cleaning and fire performance. Resolving those questions together is less disruptive than discovering during construction that the glass needs another screen or a different frame.
For a patient-room mock-up, mark the intended bed position on the floor and ask a nurse to approach it with the equipment normally used there. With another person seated in the visitor chair, test the bedside light, privacy screen, door swing and hand-cleaning point. Record each adjustment against the task it supports before repeating the layout across a floor.